How do I export production data?
Monthly production, summaries, or forecasts - getting production data has never been easier.
After applying filters to get the exact wells list you want to export, click the List button at the top right of the screen. There you can select specific wells to export or export all.
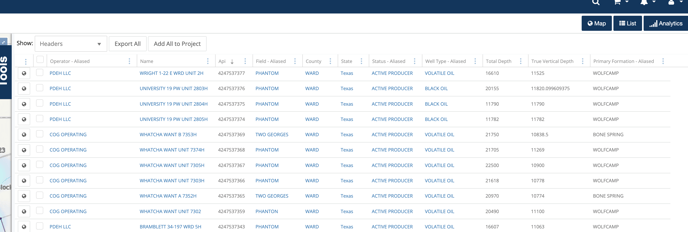
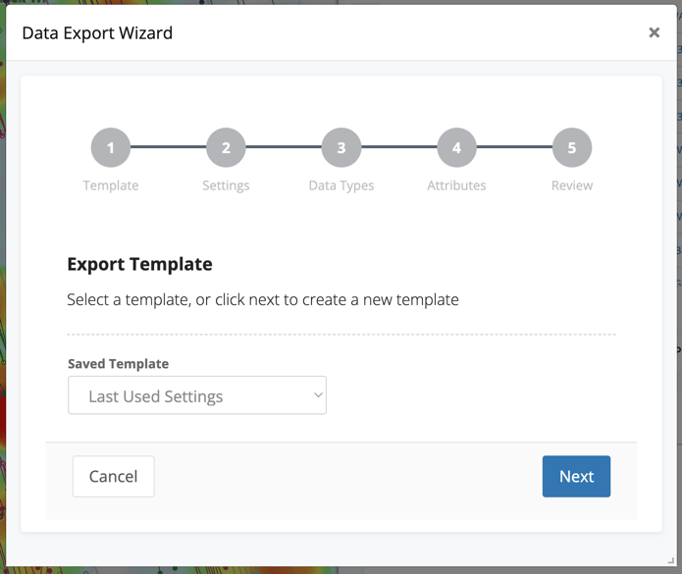
Once you click the export button, the export wizard will open. Your first choice will be to select if you want to use an existing template. If you have not created any templates yet, then your only choice will be New. You will have the option to save our settings as a template at the end of the process.
Select your template, choose Last Used Settings or New, and click Next
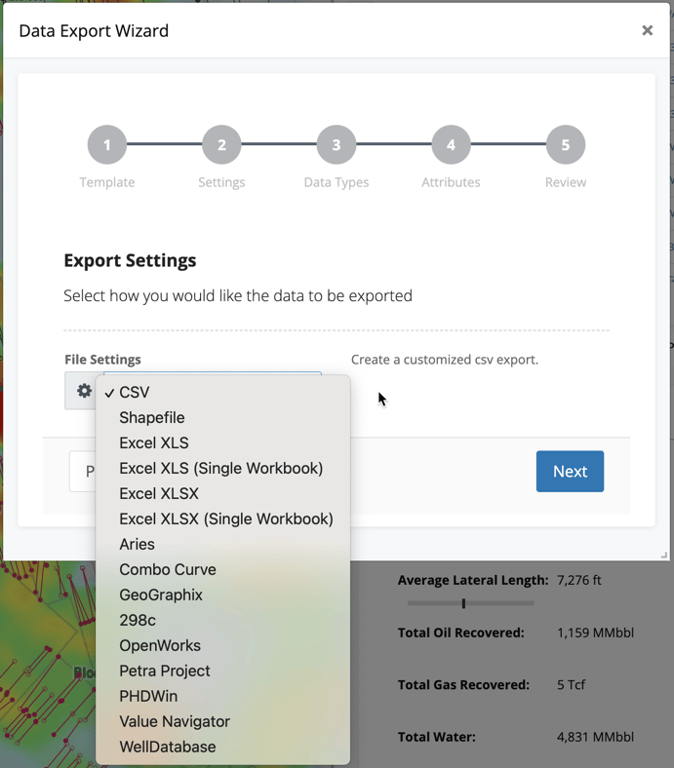
The next step is where we pick the file type we want to export. We support exports to a number of formats. For more details on any format we provide, see Which 3rd party software does WellDatabase export to?
Once you choose your export format, click Next.
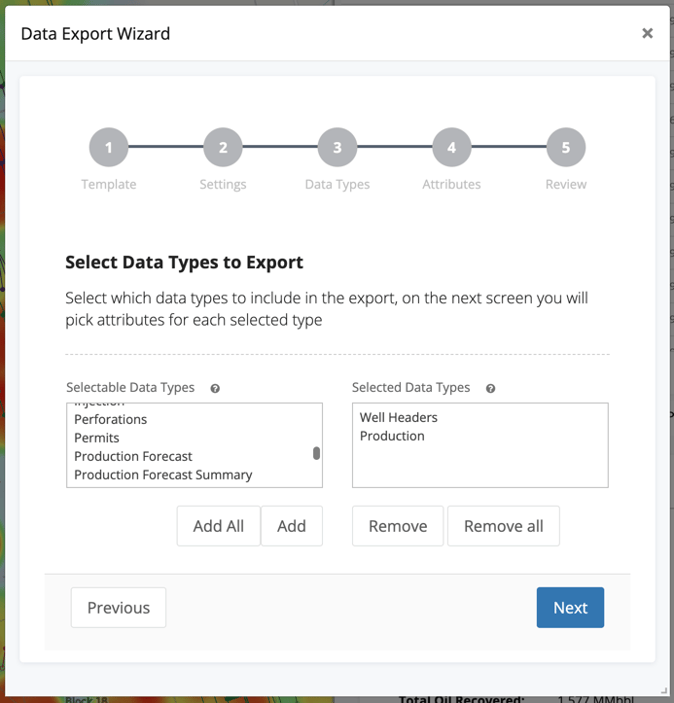
This step only applies to customizable exports like CSV, Shapefile, & Excel exports. Other export types are pre-defined and do not require you to select the data you want to export.
The data in WellDatabase is organized so that you can export the data you need without export a bunch of fluff you don't. Since we're talking about exporting production, we'll select Well Headers & Production. Well Headers contains the general well information that is often wanted in exports.
After selecting the types you want to export, click Next.
The next step is to define exactly which fields you want to export from each of the sections defined in the previous step. This allows you to fully customize your export to what you want.
Since we selected Well Headers & Production, we'll need to select the fields from each of those types. First is Well Headers.
There is an Add All button as well if you just want everything. That's what we'll click here for simplicity's sake and then click Next.
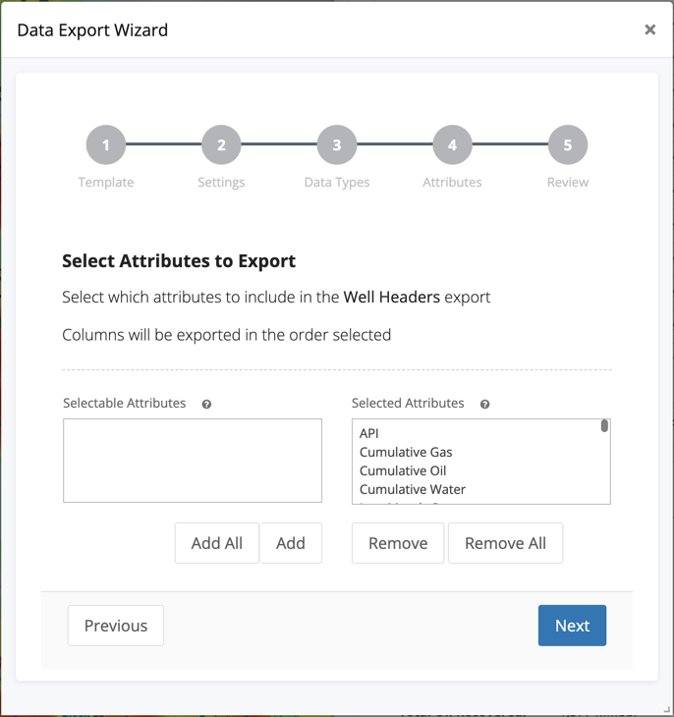
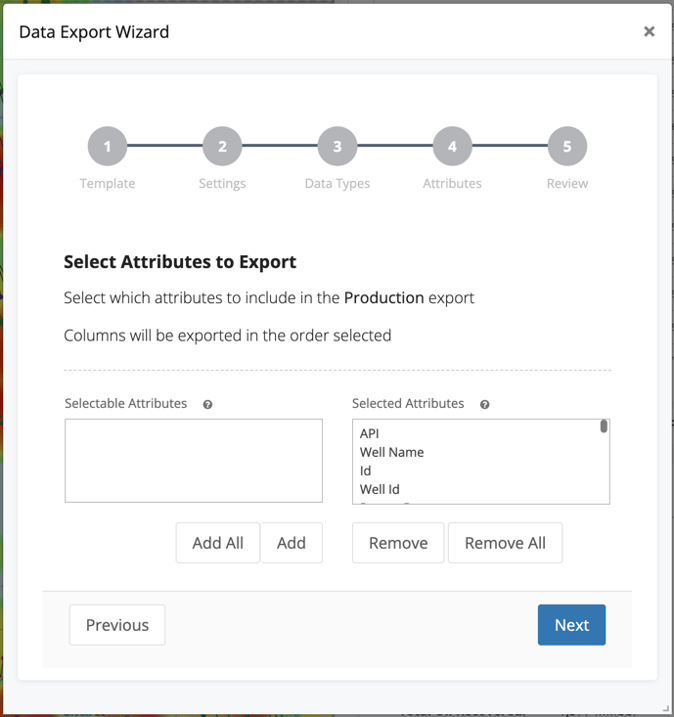
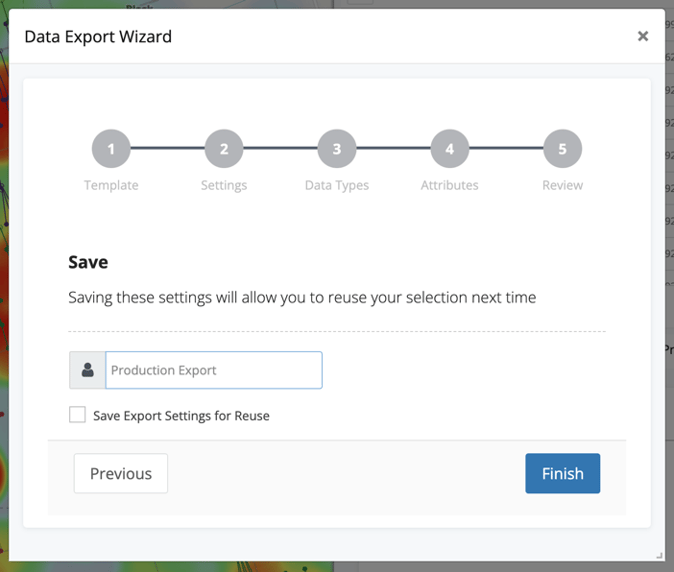
Last thing to do is to name your export. This is also where you can save your settings as a template by click the checkbox next to Save Export Settings for Reuse. Saving a template can really save time if you have a few standard exports you regularly use. Now we'll click Finish to kick off the export.
Once you click finish, there a pop up will show that the export has started.

Accessing Your Export
There are multiple ways to access your exports.
- Upon completion of the export, a blue pop-up notification will appear, indicating that the process is finished. You can click the "Download Now" link within this notification to retrieve your exported file.

- You can always check your notifications to see if the export has completed as well. To accomplish this, click on the notification bell
 in the top right of the navigation bar. You will be presented with a list of recently run exports and you can easily click "Download Now" on any of them to download the export.
- My -> Exports and My -> Files:

- In addition to the notifications, you can also manage your exports by going to the My -> Exports page. This page will display the submission date/time of your file along with its completion timestamp. In the completion column, you can easily identify whether the file is still pending or if there was an error during the export process. You can download the file directly from this page by clicking the arrow down button
 , or you can rerun this download by clicking the circular arrows
  .
. 
- Your export will be dropped into your My -> Files section where you can download it any time you want. To access your file from the files section, click the gear next to the name of the export then click "Download File"

- In addition to the notifications, you can also manage your exports by going to the My -> Exports page. This page will display the submission date/time of your file along with its completion timestamp. In the completion column, you can easily identify whether the file is still pending or if there was an error during the export process. You can download the file directly from this page by clicking the arrow down button
- How do I export lease level production?
- How do I access my exports?
- What are advanced exports?
- How can I find the first 90 day production for area?
- Can I download documents?
Explore other articles by searching the topics on the left or if you have any questions feel free to email support@welldatabase.com