Saving a search:
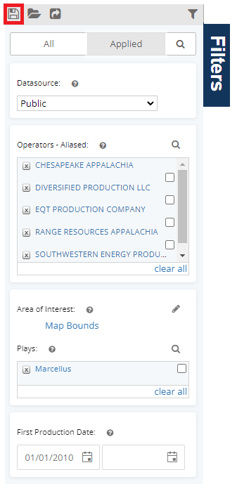
At the top of the filter pane, there are three buttons. The disk icon is the one you want to use to save your search.
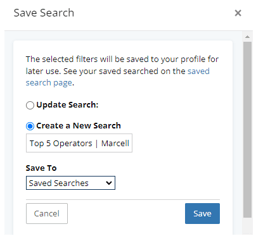
 Once you click that, you’ll get the Save Search dialog. Here you can give your search a quick name and choose whether you want this search to be attached to any projects you may have set up or simply to your private set of saved searches.
Recalling a saved search:
As you create and save searches, they all get added to a private saved searches page. On top of being a single place to view all of your searches, WellDatabase will also execute each of your searches nightly and show you the change in results on this screen.
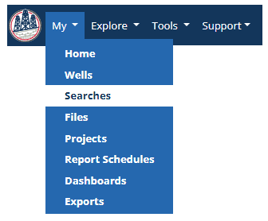
To get started, go to My> Searches
You’ll see a list of every search you have saved to your private saved searches. The list will also contain the the active number of wells returned, and the net change percentage from the last time the search ran.
To the left, there is a gear button that gives you a few additional options. Enabling alerts will set you up to receive an email any time there is activity pertaining to that particular search. Remove will simply delete the saved search from your list.
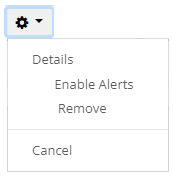
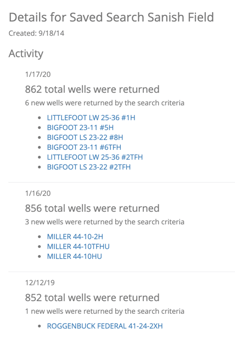
Clicking Details will give you a history of the search and details of the changes that have happened to wells pertaining to that particular search.
Clicking on the search name in the list will send you over to the well browser with that search loaded.

Project Searches:
Searches can also be saved directly to a project, read the article How do I add saved searches to a project? for more information on saving and recalling searches inside of a project.
It’s quick and easy to work with any searches you have saved in WellDatabase.