Introduction
If you haven't created a custom AOI yet, see How do I create a custom AOI map search? before continuing.
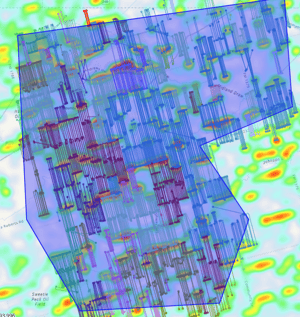
In this example, the AOI is being used to analyze a heat map. Because the default blue shading covers the underlying data, it becomes more difficult to interpret the results. By removing the AOI shading, you can keep the search boundary visible while allowing the map layers beneath it to be seen more clearly.
Access the AOI Settings
There are two ways to access the settings for an existing custom AOI.
Option 1: Hold Shift and click the AOI directly on the map.
Option 2: In the Filters panel, expand the Geographic section and click the gear icon next to Custom Area.

Open the AOI Appearance Settings
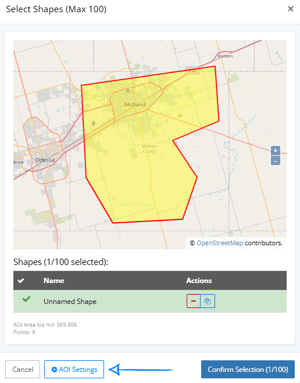
The Select Shapes window displays your saved custom AOIs. To customize how the selected AOI is displayed on the map, click AOI Settings at the bottom of the window. .
Remove the AOI Shading
The AOI Appearance Settings window allows you to customize how your AOI is displayed on the map.
To remove the shaded overlay, turn Enable off under Fill Settings. Note: If you decide you'd like the shaded overlay back, simply turn Enable back on under Fill Settings.
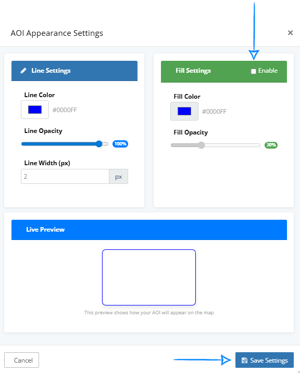
You can also adjust the Line Settings to customize how the AOI boundary is displayed on the map. The default is 2px.
 If there were multiple shapes loaded, this process could be repeated for all shapes in the select shapes dialog box. In this example, we only have one shape so we can click "Confirm Selection" in the bottom right.

Results
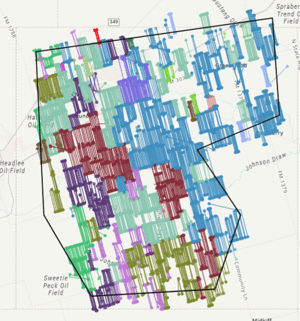
After saving the changes, the shaded overlay is removed while the AOI boundary remains visible. This provides a clearer view of the underlying map layers without changing the AOI itself.
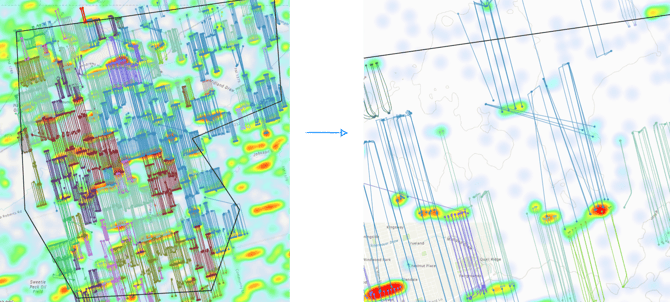
Here's another example with the heat map disabled. Even without additional map layers, removing the AOI shading provides an unobstructed view of the wells and map features while still clearly identifying the selected search area.
Related Articles
Frequently Asked Questions
Q: Does removing the AOI shading change my search results?
A: No. Changing the AOI appearance only affects how it is displayed on the map. The search area and results remain the same.
Q: Can I turn the shading back on later?
A: Yes. Open the AOI Appearance Settings and enable Fill Settings again to restore the shaded overlay.
Q: Will I still see the AOI boundary after removing the shading?
A: Yes. Removing the fill only hides the shaded overlay. The AOI boundary remains visible.
Q: Which subscription plans include custom AOIs?
A: Creating and editing custom AOIs is available with Essential, Plus, Pro, and Enterprise subscriptions. This feature is not available on the Lite (free) plan.
Explore additional articles by searching the topics on the left. If you have any questions, feel free to email support@welldatabase.com.