How do I set up the WellDatabase Excel Add-in?
The WellDatabase Excel Add-in can help you streamline your Excel based processes. See how to install it here.
Currently the WellDatabase Add-In must be installed into excel manually. The process is quick, but the steps differ depending on whether you are on a Mac or Windows machine. Microsoft provides their own documentation on how to go through this process, but we have summarized it below.
Download the WellDatabase.xml file
Whether using Mac, Windows, or Microsoft online, start by downloading the WellDatabase.xml file here (you might need to right-click & select Save Link As): WellDatabase.xml
Windows
Open Windows Explorer
Navigate to the root C: drive, and create a new folder named: wdb-excel-addin
Drop the WellDatabase.xml file downloaded from WellDatabase in the new folder.
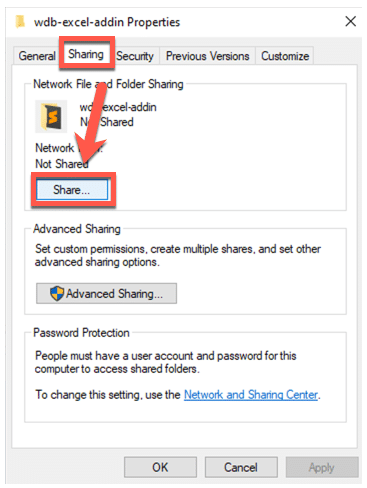
Right click on the wdb-excel-addin folder, and select Properties
Open the Sharing tab, and click the Share button.
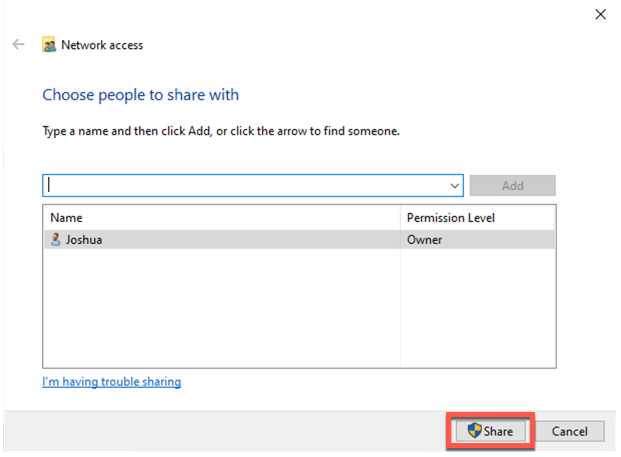
When prompted, select your user as the user to share the folder with, and click the Share button.
Open Excel
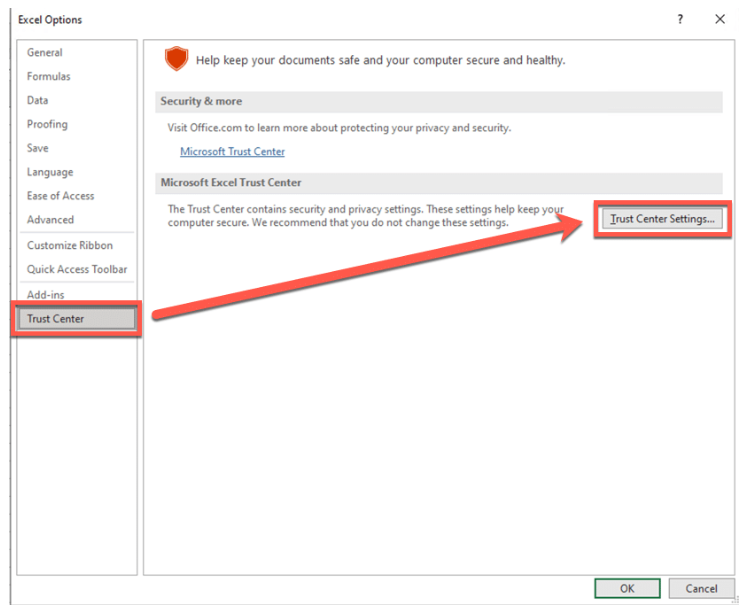
Choose the File tab, and then choose Options.
Choose Trust Center, and then choose the Trust Center Settings button.
Choose Trusted Add-in Catalogs in the left pane, and in the Catalog Url box, enter: \127.0.0.1\wdb-excel-addin, and click Add Catalog.
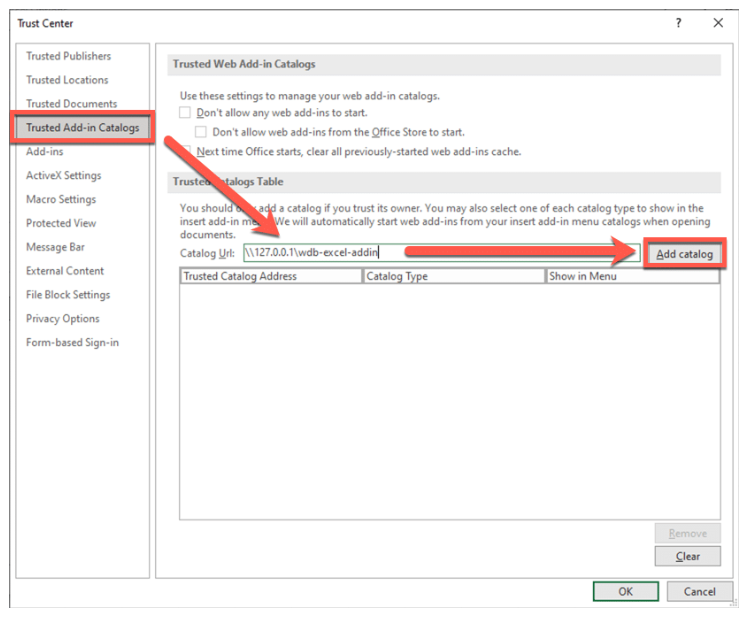
Once the item is added to the box below, check the Show in Menu checkbox, and click Ok.
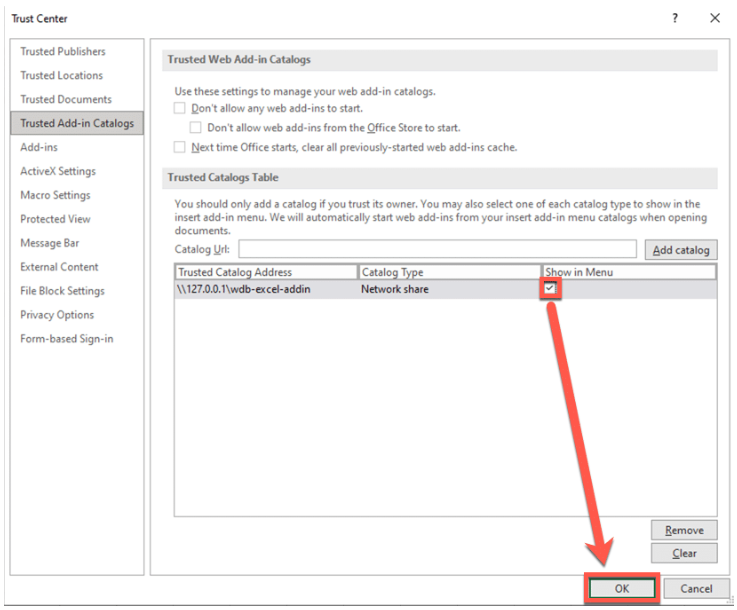
Close the trust setting dialog
Restart Excel
Create a new Workbook
Select My Add-ins on the Insert tab of the ribbon.
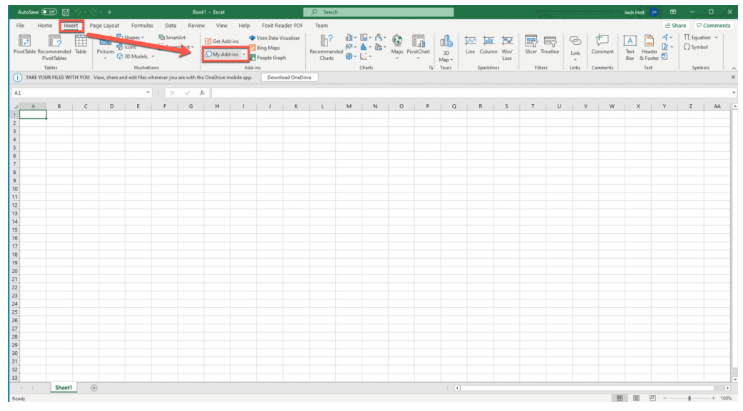
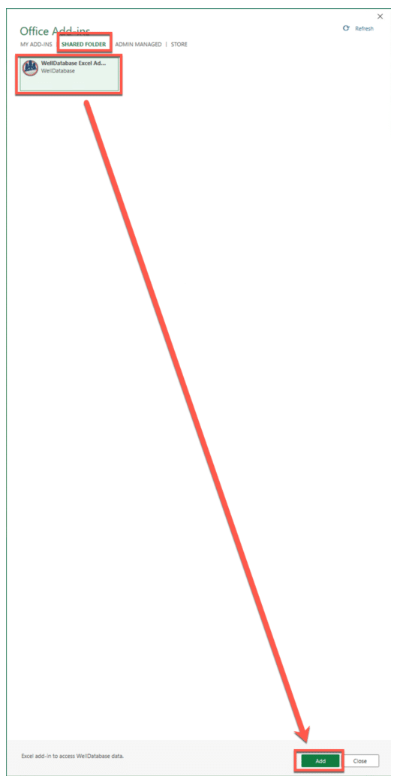
Choose SHARED FOLDER at the top of the Office Add-ins dialog box, then select WellDatabase Excel Add-in and choose Add to insert the add-in.
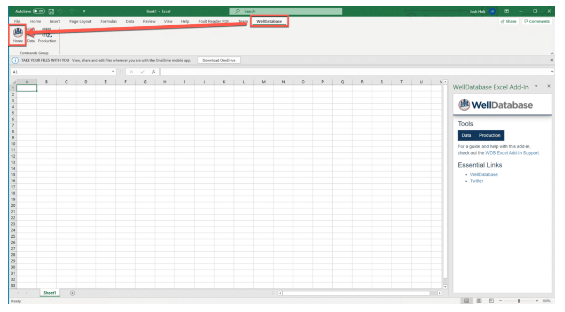
Installation is complete
MacOS
Microsoft’s documentation can be found here.
Open Finder on your Mac

In the top menu, navigate to Go, then click Go To Folder…
When the dialog pops up, enter this path:
/Users/<username>/Library/Containers/com.microsoft.Excel/Data/Documents
and then click Go
It is important to use the Go To Folder... dialog, as the folder may not be visible via the standard Finder file viewer.

When this folder opens, ensure there is a folder inside named ‘wef.’ If there isn’t create the folder.

Now open the wef folder, and drop in the manifest file provided by WellDatabase. It should be named WellDatabase.xml

Open Excel, and create a new workbook.
Choose Home > Add-ins > My Add-ins click the drop-down arrow on the right, not the button that says My Add-ins, and then choose WellDatabase Excel Add-in

Installation is complete

Office on the Web
Official Microsoft Documentation
Open Office on the web. Open a new spreadsheet in Excel. On the Insert tab on the ribbon in the Add-ins section, choose Office Add-ins.
On the Office Add-ins dialog, select the MY ADD-INS tab, choose Manage My Add-ins, and then Upload My Add-in.

Browse to the add-in manifest file you downloaded from WellDatabase, it should be names WellDatabase.xml, and then select Upload.

Web Excel will automatically launch the add-in
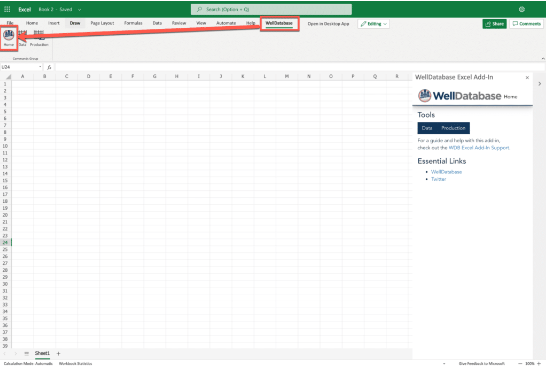
Installation is complete